
DoxRunner


Overview
DoxRunner's Test Case and Script operations rely heavily on a series of complex Microsoft Word VB macros. They treat the VUgen script files as Microsoft Word documents, even though they are simple text files. By approaching it this way the extensive functionality built into Word can be used to manipulate them.
Some illustrations use Word 2007 or 2019, while others use Word 365. Other versions may be used but the mechanism may be different.
Implementing DoxRunner involves three major steps within the Developer tab in the Solution document, which must be open:
-
Configure security;
-
Attach the macro template to Word (you must remember where you downloaded the files from this website);
-
Add an icon to the Quick Access Toolbar.
Make sure you save the Solution document when finished.
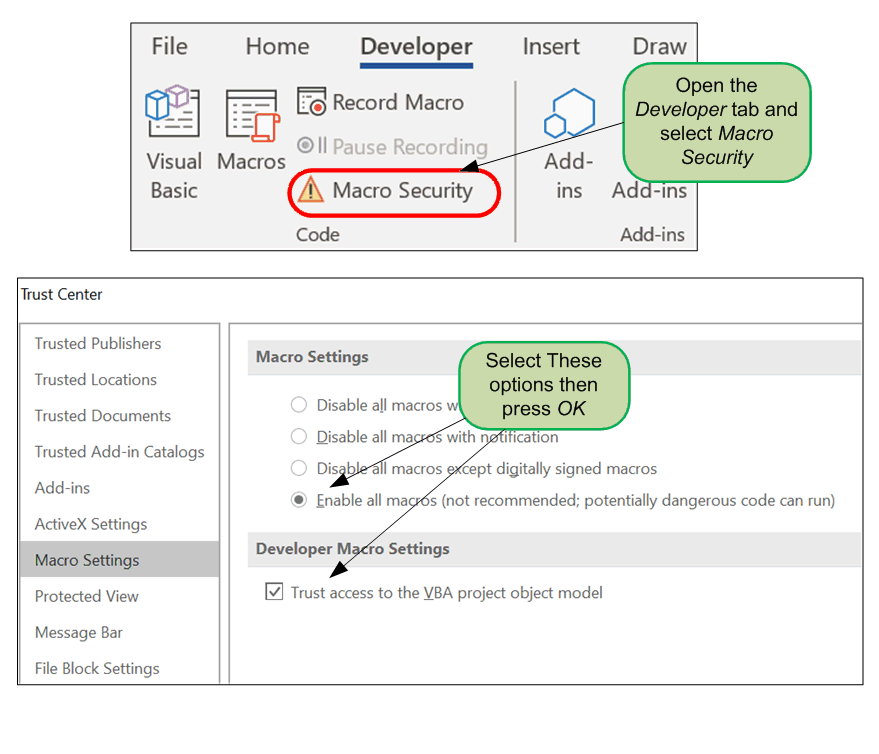
Security
Because macros are a security risk, they will most likely be disabled. You will need to enable them.
From the Developer tab, select Macro Security.
Until the macro is signed, you will need to enable all macros, then press OK.

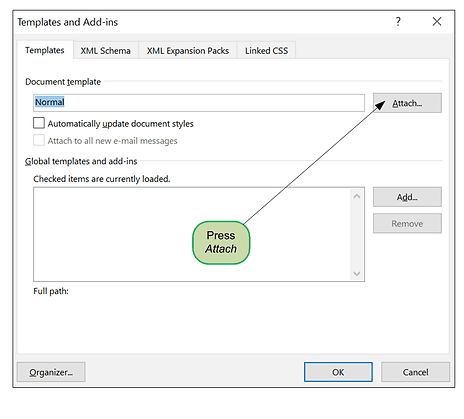
Press the Attach button
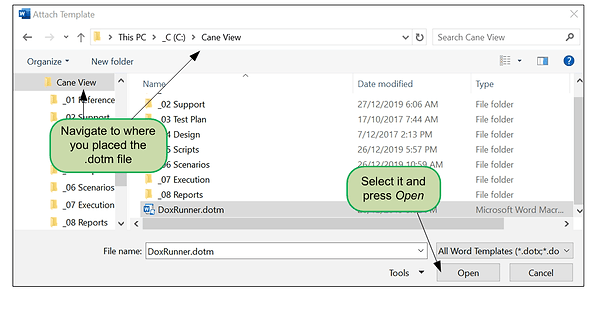
Navigate to the folder where you downloaded and renamed the DoxRunner.doc file to DoxRunner.dotm and select it.
Then press the Open button.
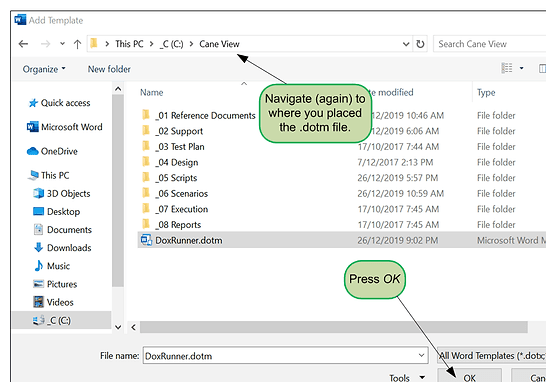
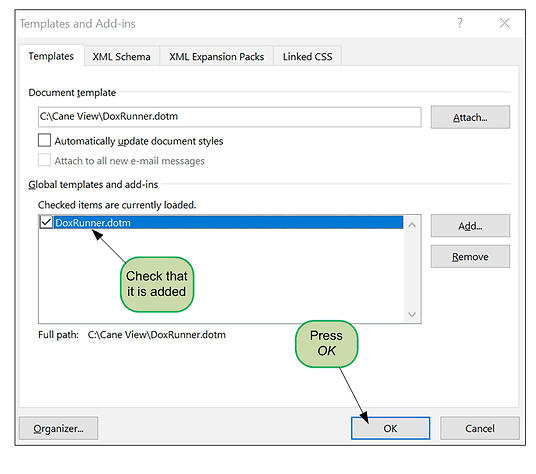
Then press the Add button.

Once again navigate to the folder where you downloaded and renamed the DoxRunner.doc to DoxRunner.dotm and select it.
Press the OK button.
Make sure the checkbox to the left of it is selected.
Then press the OK button
The DoxRunner macro will now be attached to the Solution document, and can be executed if you have configured security correctly.
Repeat this for each Solution document you require.
Execution of DoxRunner's Test Case and Script operations is facilitated by configuring the Quick Access Toolbar as described below.
Create a Quick Access Toolbar icon
To make it easier to initiate DoxRunner's Test Case and Script operations, add an icon to the Quick Access Toolbar using the following steps.
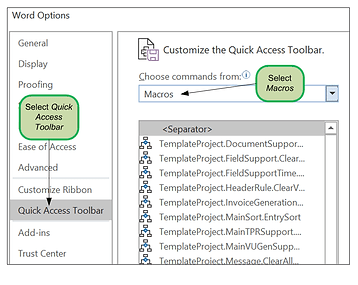
First access Word Options.
Under the Customize menu, select Macros in the Choose commands from drop-down listbox.
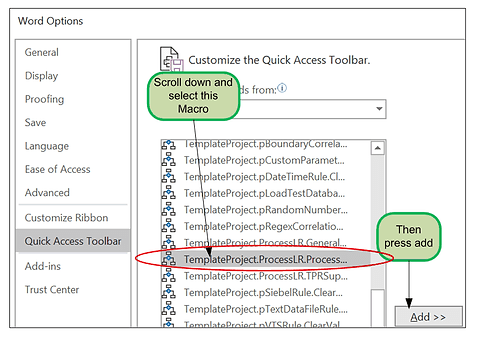
Select the macro named TemplateProject.ProcessLR.Proces... and press the Add button.
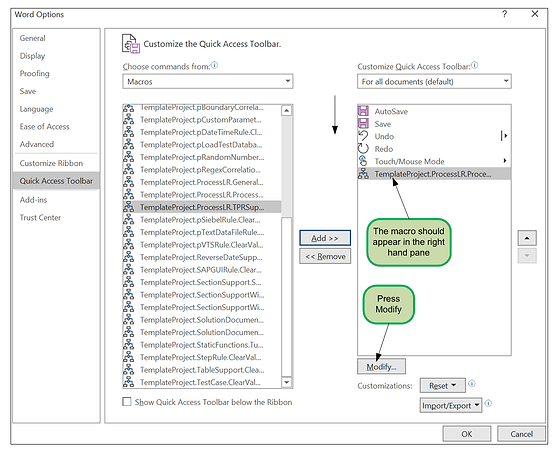
The macro name will appear in the right hand pane.
Select it and press the Modify button.
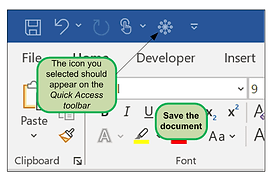
A selection of icons is displayed. Choose any icon and press the OK button.

The icon you select will appear on the Quick Access toolbar.
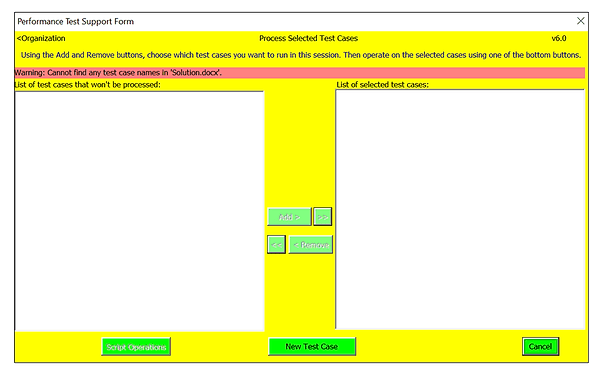
Test it by pressing it. The following form should display with the warning that there are no test cases.
You are now almost ready to use it to create your first test case.
But not yet. You should press the Cancel button then save the Solution document.
Then review the Solution document, taking particular care to add the names of the following folders into the Configuration section as Configuration Items:
-
Script folder;
-
Included files folder.
Add other items as required.